Source(google.com.pk)
Henna On Feet Design Biography
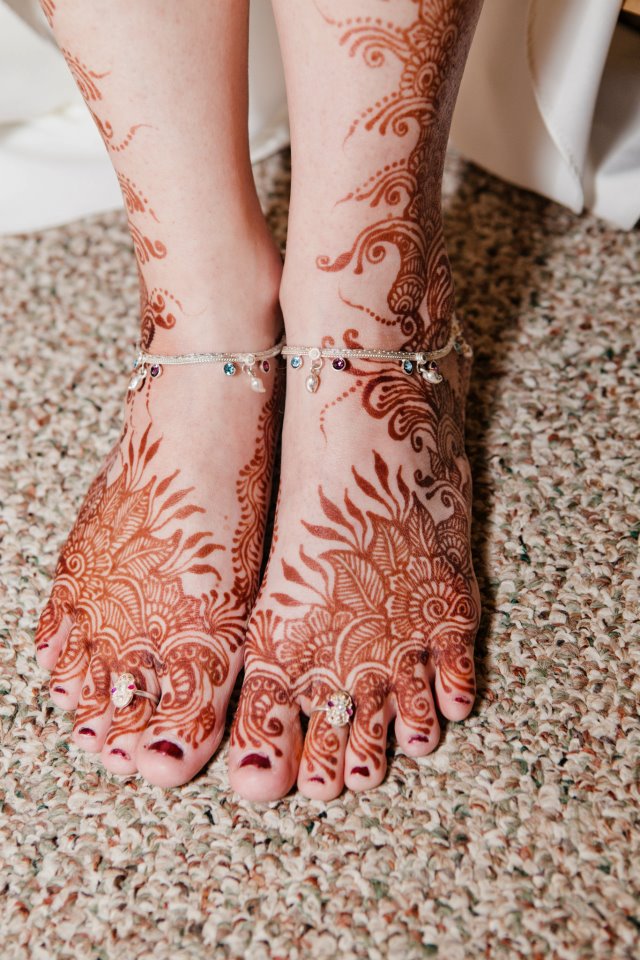
Henna is traditionally applied to the hands and feet. That's where you get the darkest color. It's no wonder the feet are such a popular place for people to have henna!
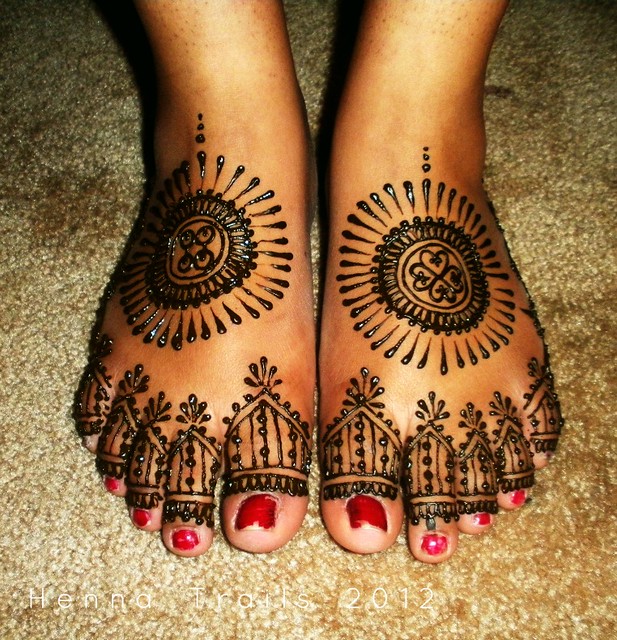
As always, pictures that show black henna are actually pictures with the henna paste still drying on the skin.
Once the paste is scrapped off (never use water to remove your henna paste) the stain is typically orange at first.
The henna will continue to cure over the next 12-72 hours (depending on your body chemistry, the henna mix ingredients, and your henna care) to develop into a brownish-red stain.
Henna is a common name for the plant Lawsonia Inermis. This plant/shrub is grown in hot, dry environments like the Middle East, Southern Asia and Northern Africa. It can grow up to 6 meters tall and it produces sweet smelling blossoms. Lawson is the natural dye that is produced in the leaves.
The leaves from this plant are harvested at different growing times each year. The leaves are carefully dried and crushed into a very fine powder. It is this powder that is used to make henna paste. The paste is traditionally used for decoration on skin, hair and nails. It is also used for off- body art on wood, silk (and other fabrics) canvas and even candles.
How is henna paste made?
Henna paste is made by mixing henna powder, lemon juice, sugar and essential oils.
But everyone’s recipe varies slightly. Please note that 100% fresh natural henna leaves a stain that starts as a light to bright orange colour and over the next 48 hrs. will turn to a deep cherry red to a reddish brown or deep brown colour.
Our henna paste is made with 100% natural fresh professional quality henna powder and top quality organic essential oil.
Henna Bee Designs Recipe:
25g fresh henna powder (body art quality)
5ml white or raw sugar
7.5 ml lavender or cajeput essential oils
lemon juice and bottled water (50/50)
In a glass or ceramic bowl add enough liquid to the henna powder and sugar to makes a paste the consistency of yogurt. Add in the essential oils and mix well.
Cover with plastic wrap and leave for 12 hours in a warm area. Check your paste to see if you have dye release (the top will be dark brown and under the top layer will be greenish still).
Mix the paste up well and cover it up and leave for up to another 12 hrs. Do a spot test on your wrist (leave a dot of henna paste on your wrist for a minute, wipe it away and see if there is a bright orange stain, usually this will tell you if your paste is ready).
Thin paste out with a little more liquid to the consistency you like. Cone it up and start having some fun!!


.JPG)


Henna On Feet Design Biography
Henna is traditionally applied to the hands and feet. That's where you get the darkest color. It's no wonder the feet are such a popular place for people to have henna!
As always, pictures that show black henna are actually pictures with the henna paste still drying on the skin.
Once the paste is scrapped off (never use water to remove your henna paste) the stain is typically orange at first.
The henna will continue to cure over the next 12-72 hours (depending on your body chemistry, the henna mix ingredients, and your henna care) to develop into a brownish-red stain.
Henna is a common name for the plant Lawsonia Inermis. This plant/shrub is grown in hot, dry environments like the Middle East, Southern Asia and Northern Africa. It can grow up to 6 meters tall and it produces sweet smelling blossoms. Lawson is the natural dye that is produced in the leaves.
The leaves from this plant are harvested at different growing times each year. The leaves are carefully dried and crushed into a very fine powder. It is this powder that is used to make henna paste. The paste is traditionally used for decoration on skin, hair and nails. It is also used for off- body art on wood, silk (and other fabrics) canvas and even candles.
How is henna paste made?
Henna paste is made by mixing henna powder, lemon juice, sugar and essential oils.
But everyone’s recipe varies slightly. Please note that 100% fresh natural henna leaves a stain that starts as a light to bright orange colour and over the next 48 hrs. will turn to a deep cherry red to a reddish brown or deep brown colour.
Our henna paste is made with 100% natural fresh professional quality henna powder and top quality organic essential oil.
Henna Bee Designs Recipe:
25g fresh henna powder (body art quality)
5ml white or raw sugar
7.5 ml lavender or cajeput essential oils
lemon juice and bottled water (50/50)
In a glass or ceramic bowl add enough liquid to the henna powder and sugar to makes a paste the consistency of yogurt. Add in the essential oils and mix well.
Cover with plastic wrap and leave for 12 hours in a warm area. Check your paste to see if you have dye release (the top will be dark brown and under the top layer will be greenish still).
Mix the paste up well and cover it up and leave for up to another 12 hrs. Do a spot test on your wrist (leave a dot of henna paste on your wrist for a minute, wipe it away and see if there is a bright orange stain, usually this will tell you if your paste is ready).
Thin paste out with a little more liquid to the consistency you like. Cone it up and start having some fun!!
Henna On Feet Design Henna Tattoo Indian Arabic Design Pictures Pics Images
Henna On Feet Design Henna Tattoo Indian Arabic Design Pictures Pics Images
Henna On Feet Design Henna Tattoo Indian Arabic Design Pictures Pics Images
Henna On Feet Design Henna Tattoo Indian Arabic Design Pictures Pics Images
Henna On Feet Design Henna Tattoo Indian Arabic Design Pictures Pics Images
Henna On Feet Design Henna Tattoo Indian Arabic Design Pictures Pics Images
Henna On Feet Design Henna Tattoo Indian Arabic Design Pictures Pics Images
Henna On Feet Design Henna Tattoo Indian Arabic Design Pictures Pics Images
Henna On Feet Design Henna Tattoo Indian Arabic Design Pictures Pics Images
Henna On Feet Design Henna Tattoo Indian Arabic Design Pictures Pics Images
Henna On Feet Design Henna Tattoo Indian Arabic Design Pictures Pics Images
No comments:
Post a Comment